Showing posts with label User Interface. Show all posts

Sunday, June 29, 2014

Android các nguyên tắc thiết kế

Các nguyên tắc này được phát triển bởi Android User Experience Team giúp người dùng cảm thấy thú vị khi trải nghiệm.

Enchant Me

Delight me in surprising ways


Vẻ ngoài đẹp, animation đặt đúng chỗ, sound effect đúng thời điểm. Một loạt các effect tinh tế sẽ khiến người dùng cảm thấy có một lực mạnh mẽ ở bàn tay của họ.

Real objects are more fun than buttons and menus
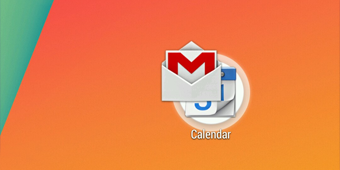

Cho phép người dùng chạm và thao tác trực tiếp lên các đối tượng trong app của bạn. Khiến cho người dùng có nhiều cảm xúc hơn.

 Let me make it mine

Mọi người thích thêm những thứ của riêng mình vào app, bởi vì nó giúp họ cảm thấy như ở nhà và có toàn quyền quết định. Bạn nên có một setting mặc định thật hợp lý, nhưng bên cạnh đó cũng cần có các sự lựa chọn và tùy chỉnh trong chương trình.

Get to know me
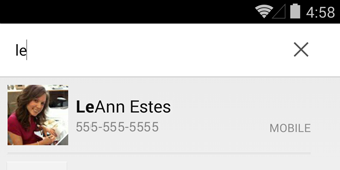

Hãy tìm hiểu và ghi nhớ sở thích của người dùng. Hơn là bắt họ đưa ra lựa chọn giống nhau hết lần này tới lần khác.


Simplify My Life

Keep it brief

Đưa ra các cụm từ đơn giản. Mọi người có xu hướng bỏ qua các câu nếu thấy chúng dài.

Pictures are faster than words


Hãy nghĩ đến việc sử dụng hình ảnh để trình bày ý tưởng của bạn. Hình ảnh khiến mọi người chú ý và mang lại nhiều hiệu quả hơn là dùng từ ngữ

Decide for me but let me have final say
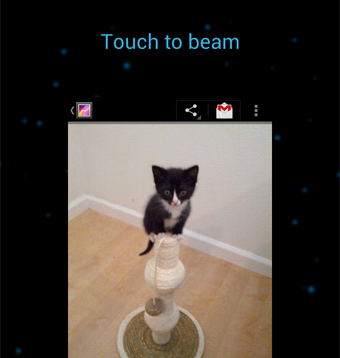

Đưa ra các lời khuyên tốt nhất cho người dùng trước khi hỏi họ. Nếu có quá nhiều sự chọn lựa sẽ khiến người dùng cảm thấy khó chịu. Trong trường hợp họ làm sai điều gì đó hãy cho phép họ làm lại

Only show what i need when i need it
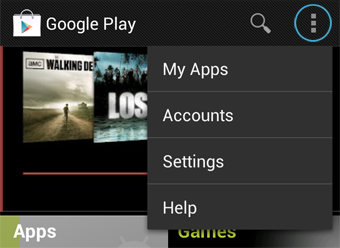

Người dùng bị quá tải nếu họ thấy quá nhiều thứ tại cùng một thời điểm. Hãy chia nhỏ các tác vụ, thông tin khiến chúng "dễ tiêu hóa". Hãy giấu đi những tùy chọn không cần thiết tại một thời điểm, và chỉ cho người dùng cách tìm ra nó.

I should always know where i am
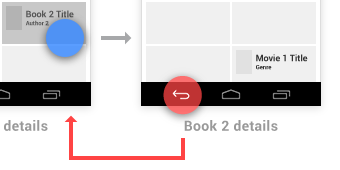

Hãy cho người dùng biết họ đang ở đâu trong chương trình của bạn. Làm cho các phần trong app của bạn trông riêng biệt. Nến có một dấu hiệu nào đó để chỉ ra rằng app đang chuyển trạng thái qua trạng thái khác hoặc chuyển từ phần này qua phần khác. Phải có sự phản hồi nào đó của các task đang được xử lý.

Never lose my stuff
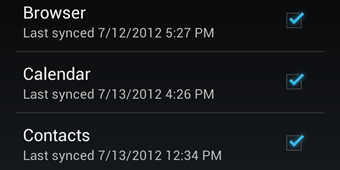

Cái này dịch ra thì hơi khó hiểu. Đại loại là nếu bạn có nhiều ứng dụng, mà các ứng dụng này đều lưu một số thông tin giống nhau của người dùng, thì thay vì bắt họ tạo lại các thông tin này bạn hãy đồng bộ hóa thông tin giữa các ứng dụng với nhau. Cho phép người dùng có thế lấy ra thông tin này ở bất cứ app nào.

If it looks the same, it should act the same
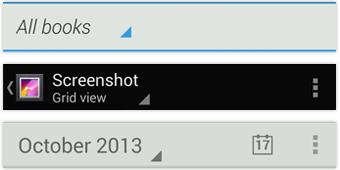

Cái này hiểu như là nếu bạn có hai cái button giống nhau thì hai cái button này phải thực hiện cùng một hành động. Tranh trường hợp hai button giống nhau thực hiện hai hành đông khác nhau.

Only interupt me if it's important
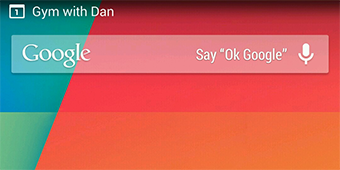

Tưởng tượng app của bạn như một người trợ lý. Hãy xử lý những điều vụn vặt không quan trọng cho người dùng sau đó thông báo lại cho họ thay vì đưa nó trực tiếp cho họ xử lý.


Make Me Amazing

Give me tricks that work everywhere
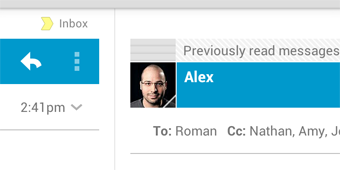

Người dùng sẽ nhanh chóng nắm bắt được cách sử dụng ứng dụng của bạn nếu nó tận dụng cách thiết kế và cách sử dụng của các ứng dụng Android khác.

It's not my fault
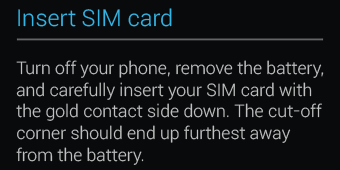

Hãy nhẹ nhàng khi hướng dẫn người dùng thực hiện các thao tác. Nếu họ làm điều gì đó không đúng, hãy đưa ra một hướng dẫn khôi phục rõ ràng kèm theo các thông tin kỹ thuật.

Sprinkle encouragement

Chia nhỏ các tác vụ khiến chúng dễ thực hiện hơn. Đưa ra các phản hồi trên các thao tác.

Do the heavy lifting for me
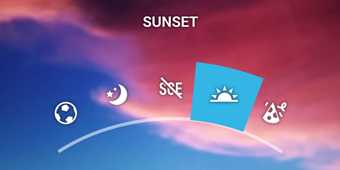

Khiến cho những người mới sử dụng cảm thấy mình chuyên nghiệp bằng cách cho phép họ làm những việc mà họ không bao giờ nghĩ mình làm được. Ví dụ chỉnh sửa hình ảnh với nhiều effect tuyệt vời qua một vài phím tắt sẽ khiến cho một photographer nghiệp dư trông thật cool :).

Make important things fast
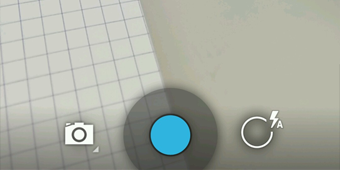

Không phải thao tác nào cũng giống nhau. Chỉ ra cái nào là cái quan trọng nhất trong ứng dụng của bạn, làm cho nó dễ dàng được tìm thấy và nhanh chóng khi sử dụng. Như nút chụp hình của một cái camera hay là nút tạm dừng của máy nghe nhạc

Tuesday, April 15, 2014

ActionBar và ListView

Bài viết này sẽ hướng dẫn các bạn sử dụng ActionBar kết hợp với ListView trong Android. Các bạn có thể xem bài viết về ListView tại đây.

Chương trình hoàn thiện sẽ có giao diện như hình bên dưới, phần ListView sẽ hiển thị danh sách các thư mục có trong sdcard, cho phép chọn nhiều item trong ListView, lọc các file bằng search box trên ActionBar.

ActionBar xuất hiện trong Android từ phiên bản 3.0(API level 11), nhưng bạn có thể sử dụng ActionBar thông qua Support Library cho các phiên bản từ 2.1(API level 7) trở lên. Trong bài viết này mình sẽ sử dụng Support Library, các bạn có thể tìm hiểu các thức setup Support Library tại đây.

Đầu tiên các bạn tiến hành tạo project mới như hình bên dưới 
Các thư mục chính trong project:
  • scr gồm có 2 class:
    • CustomListViewAdapter.java: sử dụng cho ListView
    • MainActivity.java: chứa các thành phần chính của chương trình.
  • drawable:
    • Hai file hình ảnh là icon của file và folder
    • background_selected.xml, background_deselected.xml, list_item_background_selector.xml được dùng cho các trạng thái khác nhau của ListView item.
  • layout, menu:
    • activity_main.xml: định nghĩa giao diện chính của chương trình
    • list_item.xml: giao diện của một item trong ListView
    • action_mode.xml: định nghĩa menu trong action mode.
    • main.xml: menu chính của chương trình.
  • AndroidManifest.xml:


  • activity_main.xml:


  • list_item.xml:


  • list_item_background_selector.xml:


  • background_selected.xml:


  • background_deselected.xml:


  • action_mode.xml:


  • main.xml:


  • CustomListViewAdapter.java:

public class CustomListViewAdapter extends BaseAdapter {
 
 private LayoutInflater inflater;
 private File[] listFile;
 private Context context;
 
 public CustomListViewAdapter(Context context, File[] files){
  this.context = context;
  inflater = (LayoutInflater) context.getSystemService(Context.LAYOUT_INFLATER_SERVICE);
  listFile = files;
 }
 

 @Override
 public int getCount() {
  return listFile.length;
 }

 @Override
 public Object getItem(int position) {
  return listFile[position];
 }

 @Override
 public long getItemId(int position) {
  return position;
 }

 @Override
 public View getView(int position, View convertView, ViewGroup parent) {
  if(convertView == null)
   convertView = inflater.inflate(R.layout.list_item, null);
  ImageView iv = (ImageView) convertView.findViewById(R.id.iv_icon);
  TextView tvFileName = (TextView) convertView.findViewById(R.id.tv_file_name);
  TextView tvFileSize = (TextView) convertView.findViewById(R.id.tv_file_size);
  TextView tvDateModify = (TextView) convertView.findViewById(R.id.tv_date_modify);
  File file = listFile[position];
  long size = 0;
  if(file.isDirectory()){
   size = folderSize(file);
   iv.setImageDrawable(context.getResources().getDrawable(R.drawable.folder_icon));
  }
  else{
   iv.setImageDrawable(context.getResources().getDrawable(R.drawable.file_icon));
   size = file.length();
  }
  tvFileName.setText(file.getName());
  tvFileSize.setText(readableFileSize(size));
  tvDateModify.setText(convertTime(file.lastModified()));
  return convertView;
 }
 
 public static String readableFileSize(long size) {
     if(size <= 0) return "0 B";
     final String[] units = new String[] { "B", "KB", "MB", "GB", "TB" };
     int digitGroups = (int) (Math.log10(size)/Math.log10(1024));
     return new DecimalFormat("#,##0.#").format(size/Math.pow(1024, digitGroups)) + " " + units[digitGroups];
 }
 
 public String convertTime(long time){
     Date date = new Date(time);
     Format format = DateFormat.getDateInstance();
     return format.format(date).toString();
 }
 
 public static long folderSize(File directory) {
     long length = 0;
     for (File file : directory.listFiles()) {
         if (file.isFile())
             length += file.length();
         else
             length += folderSize(file);
     }
     return length;
 }

}

  • MainActivity.java:

Các bạn có thể tải source code project tại đây

Thursday, April 10, 2014

Custom ListView

Chào các bạn bài viết này mình sẽ hướng dẫn các bạn tạo ra một custom ListView trong Android.

Sau khi hoàn thành chương trình sẽ trông như hình bên dưới:

Đây là một chương trình đơn giản, sử dụng ListView để hiển thị toàn bộ file và folder trong sdcard của thiết bị Android.

Đầu tiên các bạn tạo một android project như hình bên dưới:
Đây là cấu trúc thư mục của project sau khi tạo xong:
  • CustomListViewAdapter.java: lớp này là Adapter, đóng vai trò trung gian giữa giữ liệu(data) và ListView.
  • MainActivity.java: lớp này chịu trách nhiệm hiển thị giao diện chính của chương trình.
  • activity_main.xml: là file định nghĩa layout chính của chương trình.
  • list_item.xml: là file định nghĩa layout của một  item trong ListView.

Để có thể thao tác được với sdcard chúng ta phải thêm permission vào trong file AndroidManifest.xml
activity_main.xml:


list_item.xml:


CustomListViewAdapter.java:


public class CustomListViewAdapter extends BaseAdapter {
 
 private LayoutInflater inflater;
 private File[] listFile;
 private Context context;
 
 public CustomListViewAdapter(Context context, File file){
  this.context = context;
  inflater = (LayoutInflater) context.getSystemService(Context.LAYOUT_INFLATER_SERVICE);
  listFile = file.listFiles();
 }
 

 @Override
 public int getCount() {
  return listFile.length;
 }

 @Override
 public Object getItem(int position) {
  return listFile[position];
 }

 @Override
 public long getItemId(int position) {
  return position;
 }

 @Override
 public View getView(int position, View convertView, ViewGroup parent) {
  if(convertView == null)
   convertView = inflater.inflate(R.layout.list_item, null);
  ImageView iv = (ImageView) convertView.findViewById(R.id.iv_icon);
  TextView tvFileName = (TextView) convertView.findViewById(R.id.tv_file_name);
  TextView tvFileSize = (TextView) convertView.findViewById(R.id.tv_file_size);
  TextView tvDateModify = (TextView) convertView.findViewById(R.id.tv_date_modify);
  File file = listFile[position];
  long size = 0;
  if(file.isDirectory()){
   size = folderSize(file);
   iv.setImageDrawable(context.getResources().getDrawable(R.drawable.folder_icon));
  }
  else{
   iv.setImageDrawable(context.getResources().getDrawable(R.drawable.file_icon));
   size = file.length();
  }
  tvFileName.setText(file.getName());
  tvFileSize.setText(readableFileSize(size));
  tvDateModify.setText(convertTime(file.lastModified()));
  return convertView;
 }
 
 public static String readableFileSize(long size) {
     if(size <= 0) return "0 B";
     final String[] units = new String[] { "B", "KB", "MB", "GB", "TB" };
     int digitGroups = (int) (Math.log10(size)/Math.log10(1024));
     return new DecimalFormat("#,##0.#").format(size/Math.pow(1024, digitGroups)) + " " + units[digitGroups];
 }
 
 public String convertTime(long time){
     Date date = new Date(time);
     Format format = new SimpleDateFormat("yyyy MM dd HH:mm:ss");
     return format.format(date).toString();
 }
 
 public static long folderSize(File directory) {
     long length = 0;
     for (File file : directory.listFiles()) {
         if (file.isFile())
             length += file.length();
         else
             length += folderSize(file);
     }
     return length;
 }

}

MainActivity.java:


public class MainActivity extends ActionBarActivity {

 private ListView listView;
 private CustomListViewAdapter adapter;
 private File file;

 @Override
 protected void onCreate(Bundle savedInstanceState) {
  super.onCreate(savedInstanceState);
  setContentView(R.layout.activity_main);
  if (isExternalStorageWritable()) {
   listView = (ListView) findViewById(R.id.lv_file_view);
   file = Environment.getExternalStorageDirectory();
   adapter = new CustomListViewAdapter(this, file);
   listView.setAdapter(adapter);
  }
  else{
   Toast.makeText(this, "Can not interact with External Storage!", Toast.LENGTH_LONG).show();
  }
 }

 @Override
 public boolean onCreateOptionsMenu(Menu menu) {
  getMenuInflater().inflate(R.menu.main, menu);
  return true;
 }

 @Override
 public boolean onOptionsItemSelected(MenuItem item) {
  // Handle action bar item clicks here. The action bar will
  // automatically handle clicks on the Home/Up button, so long
  // as you specify a parent activity in AndroidManifest.xml.
  int id = item.getItemId();
  if (id == R.id.action_settings) {
   return true;
  }
  return super.onOptionsItemSelected(item);
 }

 /* Checks if external storage is available for read and write */
 public boolean isExternalStorageWritable() {
  String state = Environment.getExternalStorageState();
  if (Environment.MEDIA_MOUNTED.equals(state)) {
   return true;
  }
  return false;
 }
}
link dowload source project: source